
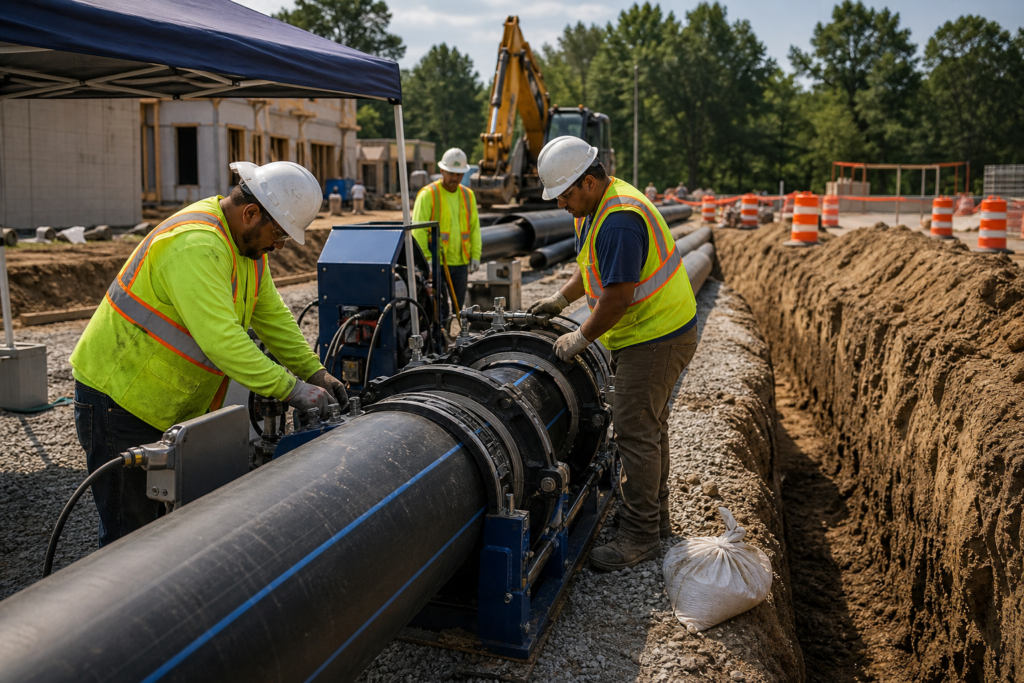
Successful HDPE pipe installation is not simply a matter of placing plastic pipe in a trench. For stormwater, drainage, or utility work, the installation method, pipe specification, trench foundation, joining procedure, alignment, backfill, testing, and records must all match the approved design and project requirements.
This HDPE pipe installation guide gives Georgia developers, contractors, engineers, superintendents, and public-agency teams a practical workflow. Use it to identify the decisions that must be made before mobilization, the points where work should pause for inspection, and the records needed for acceptance.
Key Takeaways
- Confirm project-specific requirements for HDPE pipe installation, including diameter and material specifications.
- Choose the appropriate installation method based on site conditions and project constraints.
- Document each step of the installation process, including inspections and testing, to ensure compliance with standards.
- Utilize a comprehensive documentation checklist to streamline project closeout and ensure all records are maintained.
- Understand the differences between HDPE and RCP to select the best option for stormwater management.
Quick summary

- Confirm the approved diameter, SDR, material grade, sizing system, embedment requirements, and governing specification before ordering pipe.
- Select open-cut, HDD, pipe bursting, or sliplining based on access, utilities, disruption, restoration, and existing-pipe conditions.
- Stop for inspection after foundation and bedding preparation, joining, alignment verification, initial embedment, and testing.
- Use approved fusion procedures and calibrated equipment, then retain fusion, material, alignment, compaction, and testing records.
- Do not apply a generic cover depth, compaction target, fusion setting, or test value. The contract documents and project engineer control those requirements.
Before mobilization: confirm the pipe system and site constraints
Begin with the approved drawings, specifications, permits, and material submittals. Confirm the pipe diameter, SDR, material grade, fitting requirements, embedment design, jointing method, and whether the project uses a DIPS outside-diameter sizing system. Also confirm who approves substitutions or field changes.
Georgia requirements are project-specific. One Georgia DOT special provision, for example, identifies ASTM D3350 cell classification PE 445574C, AWWA C906, DIPS sizing, and butt-fused joints with manufacturer-approved equipment for specified HDPE water pipe. It should not be treated as a universal requirement for every stormwater project. Review the applicable Georgia DOT provision for project-specific requirements.
Your pre-installation checklist should cover utility locates, access, traffic or pedestrian controls, erosion control, dewatering, trench stability, nearby structures, surface restoration, and inspection hold points. If the broader project includes several scopes, civil site work planning checks can help organize coordination before crews mobilize.
Step 1: choose the installation method

Document method selection before excavation or drilling begins. Compare each approach against the right-of-way, utility conflicts, traffic conditions, environmental constraints, restoration obligations, and existing-pipe condition.
| Method | Often considered when | Key tradeoffs |
|---|---|---|
| Open-cut excavation | There is adequate right-of-way and surface disruption is manageable. | It provides direct access for trench and bedding work, but requires excavation, utility coordination, dewatering, traffic control, and restoration. |
| Horizontal directional drilling | The line must pass beneath a paved road, rail line, landscaping, or another sensitive surface. | It can reduce surface disturbance, but requires bore planning, utility verification, drill-fluid management, pullback control, and specialized quality checks. |
| Pipe bursting | An existing pipe is being rehabilitated and surrounding conditions support replacement. | Existing alignment, service connections, nearby utilities, soil conditions, and allowable diameter changes must be evaluated. |
| Sliplining | An existing host pipe can accept a suitably sized HDPE liner. | The host pipe, annular space, hydraulic capacity, access points, and connections must be suitable. |
The least disruptive method is not automatically the best method. Record the selected approach, design basis, utility assumptions, restoration implications, and responsible approver before work starts.
Step 2: prepare the work area, utilities, and water control
Complete utility verification and mark the approved alignment before breaking ground. Confirm access for excavation equipment, pipe delivery, fusion equipment, spoil management, and emergency response. Install erosion and sediment controls in the sequence required by the project plan.
Plan dewatering before opening the trench. Water can destabilize the excavation, move bedding material, contaminate joints, and prevent reliable compaction. Shoring, trench access, sloping, and excavation protection must follow the approved design and applicable safety requirements. Generic trench dimensions are not a substitute for an engineered or contract-specific approach.
Step 3: excavate the trench and prepare the foundation
Excavate to the approved line and grade while protecting the trench from standing water, loose material, and avoidable disturbance. Inspect the exposed foundation for unsuitable soil, voids, rock, soft zones, or other conditions that could prevent continuous pipe support.
Prepare foundation and bedding material according to the drawings and specifications. Georgia DOT project specifications may require the foundation material to be shaped before pipe installation and may prescribe different backfill provisions for HDPE and PVC. The governing documents determine the required material, geometry, and compaction. Check the applicable Georgia DOT foundation and backfill language when those provisions apply.
Stop point: Before placing pipe, verify trench geometry, foundation condition, bedding material, design elevations, dewatering status, and inspection approval. Record deficiencies and corrective work before proceeding.
Step 4: place, align, and join the HDPE pipe
Inspect delivered pipe and fittings for damage, contamination, incorrect markings, or a mismatch with the approved submittal. Handle and stage pipe so it is not dragged across sharp surfaces or exposed to conditions that could compromise the joining area.
Place each section without forcing it into alignment or allowing point loading. Depending on the approved design and material system, joints may use butt fusion, electrofusion, mechanical connections, or another specified method. Butt fusion is not automatically required for every HDPE installation.
For fusion work, use calibrated equipment and an approved procedure. Control preparation, heating, alignment, joining, cooling, and inspection according to the manufacturer and project requirements. Record the operator or crew, equipment identification, pipe and fitting traceability, joint location, procedure, inspection outcome, and any rejected or repaired joint.
Stop point: Inspect every completed joint before it is covered or made inaccessible. Resolve visible problems under an approved corrective procedure rather than concealing them with backfill.
Step 5: verify alignment, grade, cover, and thermal movement
Check horizontal and vertical alignment against the approved plans. Confirm the pipe crown, invert, grade, transitions, structures, and connections. Georgia DOT specifications may require alignment checks by sighting along the crown, invert, and sides of the pipe barrel, but the contract determines the exact inspection and documentation requirements.
Cover requirements vary by application. One Georgia DOT standard excerpt lists 24 inches as minimum cover for storm and side drains and 12 inches for slope drain pipe, while also listing different maximum fill heights for HDPE, PVC, and polypropylene. These values apply only in the relevant standard and project context. Verify the applicable Georgia DOT standard details.
Account for temperature-related movement during layout and backfill. Long runs, abrupt alignment changes, connections, or exposed sections may require measures identified by the design, such as anchors or restrained details. Do not add a restraint detail without confirming that it is appropriate for the system.
Stop point: Before initial embedment, obtain documented verification of alignment, grade, cover assumptions, connections, and required thermal-movement controls.
Step 6: backfill in controlled lifts and protect the pipe
Place embedment and backfill in the sequence, material, lift thickness, and compaction condition required by the project documents. Support the pipe evenly and prevent displacement while material is placed on both sides. Keep unsuitable material and large debris out of the embedment zone.
Compaction is part of the structural installation, not merely final paperwork. Perform specified testing at required locations and stages. Avoid heavy equipment over the pipe until specified cover is achieved, and monitor for movement, deformation, or loss of grade during backfill.
Stop point: Inspect the pipe after initial embedment and before the remaining trench is filled. A second review should confirm final grade, cover, compaction results, surface restoration requirements, and the absence of visible damage.
Step 7: test the installation before final acceptance
Use the test method required for the system and specification. Depending on the application, this may involve pressure testing, low-pressure air or water testing, visual inspection, leakage review, or other owner-approved verification. Test values, duration, preparation, and acceptance criteria must come from the approved requirements.
Review test results alongside fusion logs, alignment checks, compaction reports, photographs, material records, and corrective-action documentation. If a result is outside the acceptance criteria, stop closeout and obtain direction from the engineer or owner.
HDPE or RCP: which installation approach fits the project?
HDPE and reinforced concrete pipe require different material, jointing, handling, bedding, inspection, and acceptance controls. The choice should reflect hydraulic design, loading, soil and groundwater conditions, constructability, access, connections, owner standards, and documentation requirements.
HDPE may involve fusion traceability and thermal-movement considerations. RCP may involve rigid-pipe joint selection, joint sealing, handling, and inspection requirements that differ from HDPE. If your team is evaluating a rigid stormwater alternative, compare these requirements using the RCP installation checklist.
HDPE installation documentation checklist
Assemble records as work progresses instead of recreating them at closeout. A practical acceptance package may include:
- Approved drawings, specifications, material submittals, and documented method selection.
- Permits, utility-locate records, erosion-control inspections, dewatering records, and traffic-control approvals where applicable.
- Pipe, fitting, and material certificates with delivery and traceability information.
- Trench, foundation, bedding, embedment, and unsuitable-soil inspection records.
- Fusion or jointing logs, equipment calibration records, operator information, and joint inspection results.
- Alignment, invert, grade, cover, and stakeout verification records.
- Compaction reports and photographs of concealed work.
- Required pressure, air, water, visual, or other test results, including corrective actions.
- Final measurements, connection details, photographs, and approvals.
- GDOT-compliant as-built GIS files where the contract requires that format.
Assign ownership for each record before work begins. When field conditions differ from the plans, record the change, obtain approval, and update the as-built information.
Questions to ask before the crew mobilizes
- Which specification governs the pipe, fittings, joining method, bedding, backfill, and testing?
- Who approves the installation method and field changes?
- What are the inspection hold points, and who releases each one?
- How will alignment, grade, cover, and connections be verified?
- What fusion procedure, equipment calibration, operator qualification, and traceability records are required?
- Which compaction tests apply, and where will they be taken?
- What happens if groundwater, unsuitable soil, utility conflicts, or actual elevations differ from the plans?
- Who owns photographs, test reports, stakeout records, and final as-built deliverables?
- Does the project require GDOT-format GIS files or another agency-specific closeout package?
For broader contractor screening, use a site work contractor checklist to compare documentation practices, scope coordination, and project responsibilities.
Frequently asked questions
Does HDPE stormwater pipe always need to be butt fused?
No. Butt fusion is one joining option. The approved method depends on the pipe system, fittings, application, owner requirements, and project specifications. Some work may use electrofusion or specified mechanical connections.
When is HDD a better choice than open-cut HDPE installation?
HDD may be appropriate when avoiding continuous excavation reduces disruption beneath a paved road, rail line, landscaping, or another sensitive surface. Utility conflicts, bore feasibility, drilling conditions, pullback, fluid management, access, and restoration must still be evaluated.
Can I use a standard cover depth for every HDPE drainage installation?
No. Cover depends on application, loading, material, installation details, agency standards, and contract requirements. Use the approved plans and governing standard rather than a universal number.
What records should be included in an HDPE pipe acceptance package?
Plan for material records, method selection, utility and permit documentation, bedding and foundation inspections, jointing or fusion logs, alignment and grade verification, compaction reports, test results, photographs, corrective actions, and final as-built information. Add GDOT-format GIS files when required.
How should alignment and grade be verified before HDPE pipe is backfilled?
Compare horizontal and vertical position, crown, invert, grade, cover, and connections with the approved plans. Use the required survey, stakeout, or inspection procedure and record results before initial embedment.
Conclusion
The strongest HDPE installations follow a controlled sequence: confirm the governing specification, choose the method from actual site constraints, prepare a stable foundation, join and inspect the pipe, verify alignment and cover, place controlled backfill, test the system, and preserve acceptance records.
DCBC LLC provides stormwater systems and HDPE pipe installation within its Georgia civil site work capabilities, along with construction stakeout, grade-related support, estimation and takeoff, and GDOT as-built GIS submittals. Learn more about DCBC LLC and request a project quote.