
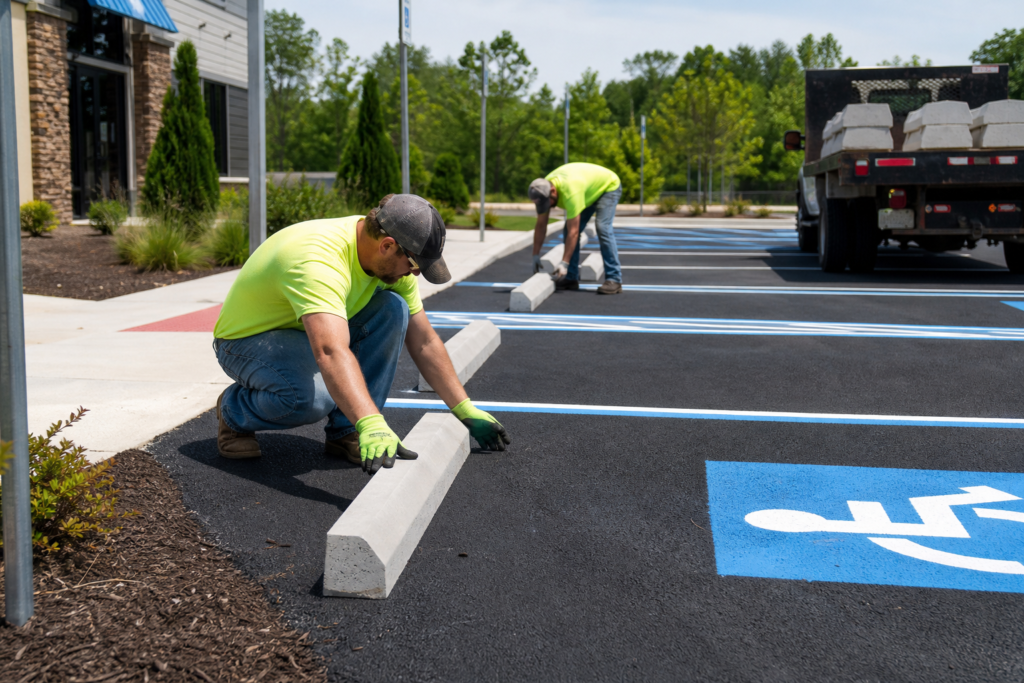
Wheel stops in a Bethlehem parking lot should control vehicle overhang or protect people and site elements without narrowing an accessible route, blocking drainage, or disrupting traffic circulation. The correct location depends on the approved parking layout, pavement and curb conditions, accessible parking design, and the site features around each stall.
There is no single Bethlehem setback or installation dimension that should be copied onto every project. Use the approved site plan, applicable accessibility requirements, project specifications, and direction from the responsible designer or authority before finalizing placement.
What Wheel Stops Should Accomplish
A wheel stop, parking block, or parking bumper can help control where a vehicle ends within a stall. Depending on the layout, it may protect a sidewalk, accessible route, building face, landscape edge, sign, fence, or other site element from vehicle overhang.
That protection is useful only when the wheel stop is located and installed as part of the complete parking layout. A poorly positioned block can become a trip hazard, interfere with a pedestrian route, obstruct drainage, reduce usable stall or aisle width, or create a conflict with doors, curbs, signs, and maintenance equipment.
Start with the function the wheel stop is meant to provide. If the concern is vehicle overhang, identify what must be protected and confirm that the proposed location does not create a new obstruction. If the concern is accessible-route protection, measure the completed route and access aisle rather than relying on a visual estimate.
The Placement Decisions to Compare Before Installation

| Placement concern | Potential risk | What to verify |
|---|---|---|
| Accessible routes and access aisles | A vehicle or wheel stop reduces required clear space or blocks movement. | Confirm the route, aisle, curb ramp, signs, and final clearances together. |
| Sidewalks and pedestrian paths | The block becomes a trip hazard or narrows the walking path. | Walk the route from the parking space to the entrance after layout markings are established. |
| Vehicle overhang | Parked vehicles damage landscaping, signs, buildings, or other improvements. | Identify the asset being protected and confirm the parking geometry supports the proposed location. |
| Curbs and landscape edges | The wheel stop conflicts with a curb face, planting area, drainage path, or maintenance access. | Review curb transitions, landscape limits, surface slopes, and maintenance needs. |
| Drainage structures | A block obstructs a grate, inlet, swale, flow path, or inspection area. | Compare proposed locations with the drainage plan and visible site features. |
| Utility covers and site equipment | Access for inspection, repairs, or emergency work is restricted. | Locate covers, valves, cabinets, hydrants, poles, and other service points before installation. |
| Traffic circulation | Blocks interfere with turning movements, loading, fire access, or service vehicles. | Review drive aisles, turning paths, delivery routes, and operational constraints. |
Accessible Parking and Accessible Routes Require the First Check
Accessible parking spaces must connect to access aisles and an accessible route to an accessible entrance. Federal accessibility guidance explains that accessible spaces should be located on the shortest accessible route and that access aisles provide the designated area needed to enter and exit a vehicle. ADA parking guidance should be reviewed with the approved project layout.
Where an accessible route runs in front of a parking space, a wheel stop may help prevent a vehicle from reducing the route below the required clear width. ADA.gov specifically identifies wheel stops as a possible way to keep vehicle overhang from reducing an accessible route below 36 inches in that situation. Federal restriping guidance also emphasizes checking the completed condition, not just the plan view.
Do not place a wheel stop in an access aisle or use it to define an accessible space without confirming the complete design. Check the aisle width, route connection, curb ramp, sign post, curb face, drainage grate, landscape edge, and any change in pavement level. The route should remain usable after all components are installed.
For a practical review, walk from each accessible space to the entrance. Look for points where a person could be forced behind parked vehicles, into a travel lane, around a sign post, or across an unexpected obstruction. The ADA Standards guidance provides the federal framework, but it does not replace project-specific review or approval.
Why Bethlehem Does Not Have One Universal Wheel-Stop Dimension in This Guide
The available Bethlehem parking research does not establish one universal wheel-stop setback, spacing, height, anchoring method, or installation dimension for every parking lot. A commercial development, residential project, public facility, and existing lot correction may each have different plans, site constraints, agencies, and specifications.
A generic number can therefore create a false sense of compliance. The controlling information should come from the approved site plan, applicable accessibility requirements, project specifications, and the responsible designer or reviewing authority.
Before installation, confirm which drawing controls the parking layout, whether the project has accessibility comments, and whether the owner, engineer, municipality, or public agency has issued a detail. If those directions conflict, pause the installation and resolve the conflict in writing.
Wheel Stop Placement Checklist for a Bethlehem Site
Use this checklist during design review, a site walk, or quote preparation:
- Approved layout: Confirm the current plan revision, parking stall geometry, access aisles, sidewalks, curb ramps, entrances, and traffic flow.
- Accessible spaces: Identify every accessible space and verify the route, aisle, signs, curbs, and clear width after installation.
- Pedestrian movement: Trace routes from parking spaces to buildings, sidewalks, crosswalks, transit areas, and public entrances.
- Vehicle movement: Review drive aisles, turning paths, loading areas, service access, fire lanes, and delivery movements.
- Drainage: Locate catch basins, drop inlets, grates, swales, curb inlets, channels, and low points. Do not obstruct flow or maintenance access.
- Utilities: Identify utility covers, valves, cabinets, hydrants, light poles, sign posts, and other equipment that must remain accessible.
- Site elements: Check buildings, walls, landscaping, fences, islands, bollards, curbs, and pavement edges that may be affected by vehicle overhang.
- Pavement condition: Confirm that the surface is sound enough for installation and identify repairs, milling, resurfacing, or grading work that should occur first.
- Markings and signs: Coordinate parking stalls, crosswalks, accessible markings, directional markings, traffic signs, and wheel stops as one package.
- Final verification: Measure and walk the completed layout before closeout, including accessible routes and areas near drainage or utilities.
For broader planning, a site work contractor checklist can help organize plan revisions, scope boundaries, site conditions, responsibilities, and closeout documentation before mobilization.
Coordinate Wheel Stops With Paving, Drainage, Striping, and Signs
Wheel-stop installation is rarely an isolated decision when a parking lot is being built, resurfaced, restriped, or corrected. Grading affects drainage, drainage affects pavement performance, and paving or resurfacing affects the final elevation and location of markings and site elements.
A practical sequence is to confirm the plans and grades first, address drainage and subgrade concerns, complete required paving or resurfacing, establish final striping and signage locations, install wheel stops without blocking routes or drainage, and then perform a closeout walk. The exact sequence may change with the project, but final placement should be checked against completed conditions.
If standing water, damaged pavement, or uncertain grades are present, resolve those issues before treating wheel stops as the main scope. Drainage coordination may require review of inlets, pipes, swales, or other features. A stormwater drainage risk review can help identify conflicts that are easy to miss during a simple parking-lot walk.
Information to Assemble Before Requesting a Wheel-Stop Installation Quote
A complete request helps a contractor distinguish a focused installation from a larger parking-lot or civil site-work scope. Provide:
- Bethlehem site address and facility type.
- Current parking plans, survey information, or marked-up aerial photographs.
- Total parking count and proposed wheel-stop quantity.
- Accessible-space and access-aisle locations, along with route and entrance information.
- Photographs showing curbs, sidewalks, drainage structures, utilities, landscaping, pavement edges, and existing markings.
- Pavement history and visible concerns such as cracking, potholes, uneven areas, or planned resurfacing.
- Required parking stalls, crosswalks, accessible markings, traffic signs, directional markings, and wheel-stop locations.
- Operating hours, delivery routes, pedestrian restrictions, and access requirements during installation.
- Known plan comments, agency requirements, specifications, or responsible design contacts.
- Whether grading, drainage, asphalt paving, milling, sealcoating, striping, signage, or erosion control should be included.
Ask the proposal to identify quantities, assumptions, exclusions, surface preparation, layout responsibility, access restrictions, cleanup, and final verification. Comparing complete scopes is more useful than comparing an installation price without knowing what the price excludes.
When a Coordinated Civil Site-Work Scope Makes Sense
A focused wheel-stop scope may be appropriate when pavement, grades, drainage, markings, and signs are already in place and the layout is clear. A coordinated scope makes more sense when the lot is being developed, resurfaced, restriped, regraded, or corrected around drainage and pedestrian routes.
DCBC LLC’s listed services include wheel stop installation, parking stalls, crosswalks, handicapped striping and signing, highway signs, asphalt paving and milling, earthwork and grading, stormwater systems, erosion control, and broader civil site work. The company identifies as a Georgia DOT-certified contractor serving commercial developments, residential subdivisions, roads and highways, and public infrastructure projects in Georgia.
Depending on the project, buyers can request a focused wheel-stop installation scope or ask for wheel stops to be coordinated with related paving, striping, signage, grading, drainage, or erosion-control work. The final scope should still follow approved plans and responsible project direction.
Frequently Asked Questions
Does every parking space in a Bethlehem parking lot need a wheel stop?
No. Wheel stops are not automatically appropriate or necessary for every stall. The decision depends on the approved layout, vehicle overhang risk, nearby sidewalks or buildings, accessible routes, landscaping, drainage, traffic circulation, and project requirements.
Can a wheel stop be placed in an accessible access aisle or accessible route?
It should not obstruct the required access aisle or accessible route. Where a route runs in front of a space, a wheel stop may help control vehicle overhang, but the completed layout must preserve the required clear path and comply with the approved design.
Should wheel stops be installed before or after parking-lot striping?
Coordinate the layout before striping, then install and verify the wheel stops in relation to the final markings. On a new or resurfaced lot, paving and surface preparation generally need to be resolved first. The exact sequence should reflect the project plans and site conditions.
What should a contractor review before installing wheel stops near a sidewalk or drainage structure?
Review the approved parking layout, accessible route, sidewalk width, curb ramps, drainage flow, inlets, grates, utility access, pavement condition, and vehicle turning paths. A final site walk should confirm that the installed blocks do not create a new obstruction.
Can wheel-stop installation be included with paving, striping, signage, or other civil site work?
Yes. It can be included in a coordinated scope when related services are needed. Each item should be listed clearly in the proposal so pavement condition, grading, drainage, markings, signs, and wheel-stop locations are addressed together.
Conclusion: Choose Placement by Function, Not Habit
Good wheel stop placement protects accessible routes, pedestrians, buildings, landscaping, signs, and other site elements without creating a new obstruction. In Bethlehem, the safest approach is not to copy a universal setback. Confirm the approved plan, measure the completed accessible route, review drainage and utilities, and coordinate the work with paving, striping, signage, and circulation.
Prepare the site address, current plans, photographs, quantities, pavement information, accessible parking layout, and related civil-work requirements before requesting a quote. For a focused installation or coordinated parking-lot scope, contact DCBC LLC to discuss the project requirements.