
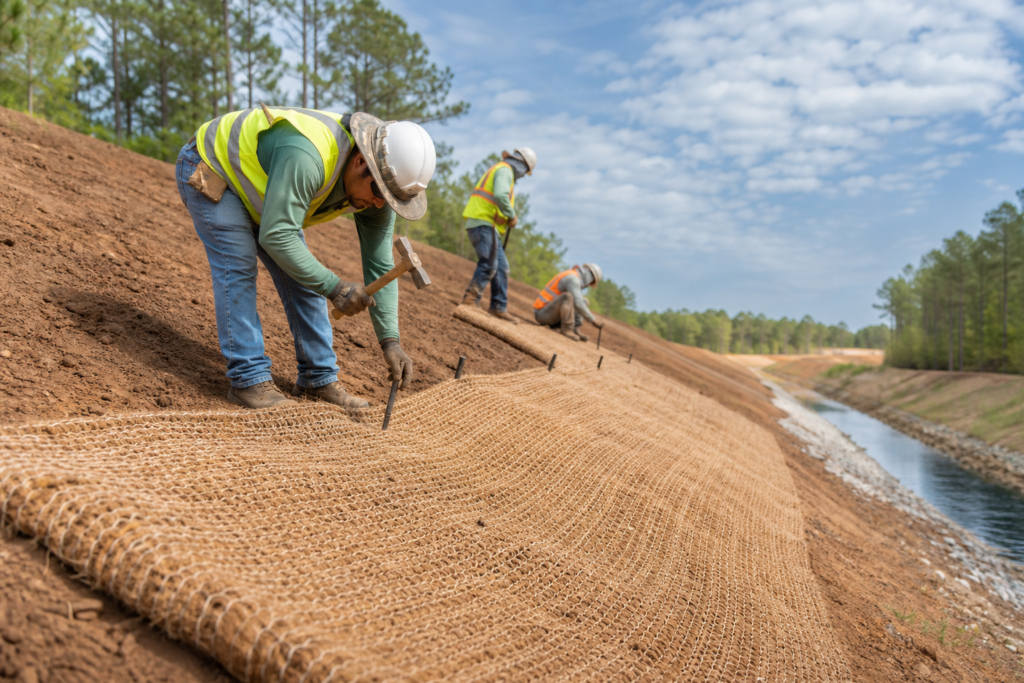
Erosion matting installation can protect exposed soil and support temporary or permanent vegetation on slopes, channels, shorelines, and areas of concentrated flow. It is not a universal substitute for grading, drainage, silt fencing, inlet protection, or other controls. The right approach depends on approved plans, site conditions, intended stabilization, and applicable Georgia requirements.
A sound process is to review the documents, assess the slope and flow path, prepare the surface, confirm the specified matting system, install and anchor it carefully, coordinate related controls, and assign inspection and maintenance responsibilities.
When Is Erosion Matting the Right Control?
Erosion matting is generally considered where exposed soil needs surface protection and where a project requires help establishing or protecting vegetation. Georgia guidance identifies mats and blankets for applications that may include steep slopes, channels, shorelines, and concentrated-flow areas. Appropriate staking is essential to prevent shifting.
That does not mean every exposed area needs matting or that one product works in every condition. Slope angle, slope length, soil, flow, drainage outlets, expected vegetation, construction sequence, and project specifications all affect the decision. If grades are unstable, water is actively cutting the area, or field conditions conflict with the plans, stop and obtain project-specific direction.
Matting should also be distinguished from erosion control revegetation. Matting may protect the surface while vegetation becomes established, while revegetation, seeding, mulching, and other controls address different parts of stabilization.
Erosion Matting Compared With Other Site Controls

| Control | Primary function | Planning focus |
|---|---|---|
| Erosion matting | Protects exposed soil on selected slopes, channels, shorelines, or flow areas. | Confirm the system, surface preparation, anchoring, overlaps, edges, and drainage interfaces. |
| Seeding and mulching | Helps establish vegetation while covering or protecting soil. | Coordinate materials, soil, moisture, timing, and stabilization objectives. |
| Silt fence | Helps control sediment movement along selected edges or downslope areas. | Place it according to drainage patterns and maintain it as conditions change. |
| Inlet protection | Helps limit sediment entering stormwater inlets. | Coordinate protection with inlet locations, access, and maintenance. |
| Check dams | Can help manage concentrated flow in suitable channels. | Confirm that grade, flow, and site design support their use. |
DCBC LLC lists erosion matting alongside silt fence, seeding, mulching, inlet protection, and check dams as part of its erosion control services. The correct combination must still follow project documents and site conditions.
Step 1: Review Plans and Site Constraints
Start with current erosion and sediment control plans, grading plans, drainage details, specifications, revisions, and permit or inspection requirements. Identify designated matting areas, the stabilization objective, the required product or installation detail, and approval responsibilities.
Review access, equipment routes, stockpiles, utilities, roadway crossings, culverts, channels, and the sequence of earthwork and drainage installation. Effective civil site work coordination defines these interfaces before mobilization.
Stop point: Do not improvise when plans are missing, conflicting, or unclear about matting, anchoring, drainage interfaces, or stabilization. Resolve the issue with the engineer, owner, inspector, or qualified contractor first.
Step 2: Assess the Slope, Soil, and Flow Path
Walk the area and record slope, length, concentrated-flow paths, drainage outlets, culverts, channels, and locations where water could undermine or shift the material. Look for rills, loose soil, standing water, debris, soft areas, and transitions into pavement, structures, inlets, or other controls.
A system suitable for a stable slope may require different treatment in a channel or concentrated-flow area. Also determine whether the objective is temporary protection, permanent vegetation, or another final surface.
Stop point: If water is actively cutting the area, the grade is unstable, or the flow path differs from the plans, resolve the drainage or design issue before installing matting.
Step 3: Prepare the Surface
Complete required grading and shape the surface to approved lines and grades. Remove rocks, branches, debris, and protrusions that could create voids or prevent close contact. Fill or smooth rills and depressions as directed, and complete required soil preparation or vegetation work.
Wrinkles, unsupported areas, loose edges, and uncorrected channels can create paths for water to lift or bypass the system. Keep drainage features functional and accessible during preparation.
Stop point: Do not install over a surface that is still being substantially regraded, actively eroding, or obstructed by unresolved drainage.
Step 4: Confirm the Matting System
Use the plans, specifications, applicable Georgia guidance, and site assessment to confirm the matting type and method. Review orientation, coverage, overlap, anchoring pattern, edge treatment, vegetation objective, and transitions to channels, structures, and drainage features.
Do not select a product solely because it is available or familiar. The required system may depend on temporary protection, permanent vegetation, channel stabilization, shoreline protection, or another documented use.
Step 5: Place and Anchor the Matting
Place material according to the approved direction of work and maintain close contact with the prepared surface. Treat the beginning and end of each run, overlaps, seams, side edges, slope breaks, drainage transitions, and connections to other controls as separate details.
Use the specified stakes, staples, or other approved anchoring method. Pay particular attention to edges, terminations, overlaps, channel transitions, and concentrated-flow areas. Common risks include loose edges, inadequate anchoring, wrinkles, gaps, exposed seams, and material that blocks drainage.
Stop point: Pause if field conditions differ from the approved detail, anchoring cannot be achieved, or installation would block or redirect drainage.
Step 6: Coordinate Drainage and Other Controls
Coordinate matting with final grades, stormwater structures, slope drains, culverts, roadway crossings, channels, inlets, and outlets. It may also need to work alongside silt fence, inlet protection, check dams, seeding, and mulching.
Define who installs, inspects, maintains, repairs, and adjusts each control. This is particularly important on commercial, subdivision, roadway, highway, and public infrastructure projects where grading changes can affect drainage paths, pavement elevations, access, and stabilization quantities.
Step 7: Inspect, Maintain, and Document
Inspect completed work against the plans and installation details. Confirm surface coverage, secure anchors, closed seams and overlaps, stable edges and transitions, and functional drainage paths. Check for wrinkles, lifted corners, exposed soil, displaced material, washouts, and equipment damage.
Inspection timing should follow project requirements and include checks after significant weather or other events. Assign maintenance responsibility before installation begins, including who repairs damage and what conditions trigger corrective work.
Common Risks to Check Early
- Unverified product selection: Match the system to documented slope, channel, flow, and vegetation objectives.
- Poor surface preparation: Voids, rills, debris, and active erosion undermine contact and anchoring.
- Unsecured seams and edges: Starts, terminations, overlaps, and transitions need specific treatment.
- Ignored drainage interfaces: Matting should not block inlets or redirect flow unexpectedly.
- Premature installation: Later grading, utility work, or equipment traffic can disturb the material.
- Unclear maintenance ownership: Inspection, repair, and documentation responsibilities must be assigned.
What to Include in an Installation Scope
- Current plans, specifications, revisions, and applicable permit requirements.
- Locations, approximate areas, slope or channel information, and stabilization objectives.
- Soil, grading, drainage, access, roadway crossing, culvert, inlet, and outlet conditions.
- Specified matting, orientation, coverage, overlaps, seams, transitions, and anchoring.
- Surface preparation, seeding, mulching, revegetation, and related controls.
- Installation sequence, equipment access, protection from other trades, and coordination duties.
- Inspection frequency, storm-event checks, maintenance, repair responsibility, and closeout records.
- Assumptions, exclusions, quantities, alternates, and interfaces with other project parties.
Specialized Scope or Turnkey Civil Contractor?
A focused erosion-matting package may fit when grading and drainage are complete. A coordinated erosion-control scope may be better when matting must be installed with silt fence, inlet protection, check dams, seeding, mulching, or stormwater work.
Turnkey civil site work may suit projects involving earthwork, drainage infrastructure, roadway construction, paving, and final stabilization. The proposal should identify who owns each interface, document, inspection, quantity, and corrective action.
DCBC LLC identifies itself as a Georgia DOT-certified contractor and lists civil site work, erosion matting, stormwater systems, grading, paving, and related construction and consulting capabilities. Project plans and applicable requirements still determine the work required.
Frequently Asked Questions
What is the difference between erosion matting and an erosion control blanket?
The terms may describe related rolled erosion-control materials used to protect soil and support vegetation. The required product, installation detail, and anchoring method should come from project documents and site conditions.
Can erosion matting replace silt fence or inlet protection?
Usually, no. Matting protects selected soil surfaces, while silt fence and inlet protection address sediment movement and stormwater-entry points. The plans should determine which measures are required together.
Should erosion matting be installed before or after final grading?
It should be coordinated with the approved final or interim grade. Installing too early can expose the material to disturbance from later earthwork, utilities, or equipment. Confirm sequencing with the grading, drainage, and erosion-control plans.
What information should I provide for a quote?
Provide current plans, affected areas, slope or channel details, soil and drainage information, stabilization objectives, specified materials, access restrictions, sequencing, related controls, inspection requirements, maintenance expectations, and closeout documentation.
Conclusion: Define the Installation Before Mobilization
Erosion matting installation works best as one part of a coordinated stabilization plan. Confirm the plans, assess the slope and flow path, prepare the surface, follow the specified system, secure every edge and transition, protect drainage functions, and assign inspection and maintenance responsibilities before work begins.
For Georgia projects, gather the plans, affected-area information, drainage details, stabilization objectives, and documentation requirements before requesting pricing. DCBC LLC lists erosion matting, erosion control, stormwater, grading, roadway, and broader civil site work capabilities through DCBC LLC.